1
Unit A · From blocks to text
The same program, both ways
What we are making: the blink from Level 1 — identical circuit, identical behaviour — but typed instead of dragged.
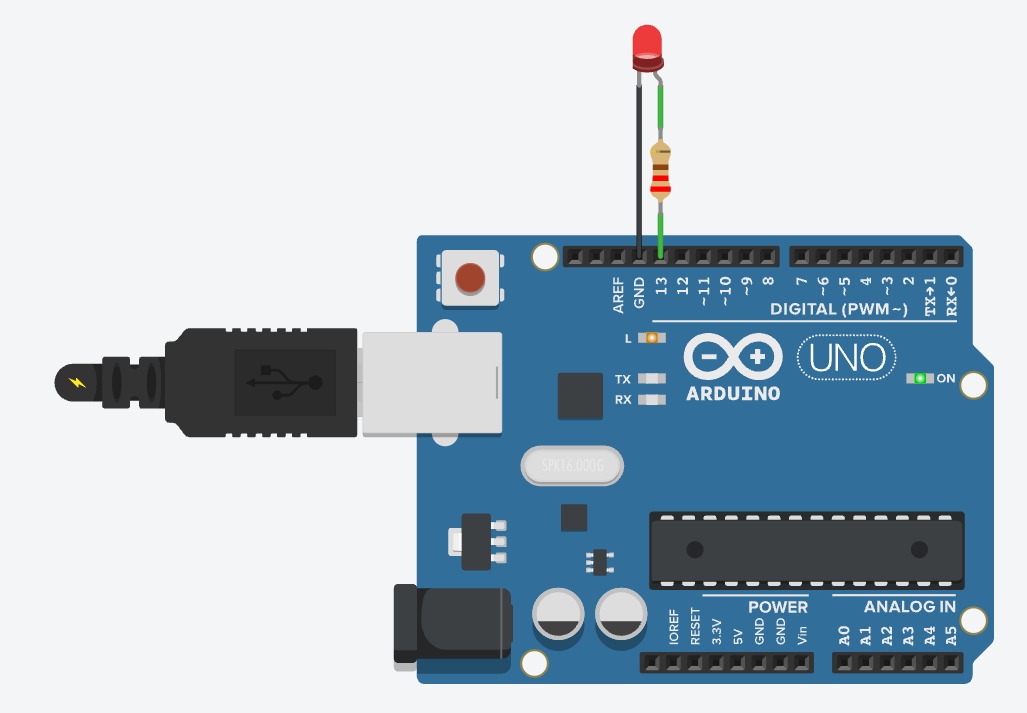
Photo: Arduino with a breadboard LED lit, laptop showing the Arduino IDE
The idea
We are deliberately starting with something you already know how to do. That way the circuit, the behaviour and the goal are all familiar, and the only new thing in the room is the language.
You are also swapping editors. mBlock goes away; from now on you use the Arduino IDE, which is what professionals use for these boards.
💡 Tip
Open last year's blink program in mBlock and look at it while you type this one. Find each block in the text. Everything maps across — nothing has been added or removed.
Side by side
Here is the whole program, both ways. Read across, row by row.
The block you already know
The line that does the same thing
when green flag clicked
void setup() {
set pin 9 to output
pinMode(9, OUTPUT);
}
forever
void loop() {
turn on pin 9
digitalWrite(9, HIGH);
wait 1 seconds
delay(1000);
turn off pin 9
digitalWrite(9, LOW);
wait 1 seconds
delay(1000);
}
Nine blocks, nine lines. Nothing was added and nothing was taken away.
- The green flag became
void setup(). Both mean 'do this once, at the start'. - The forever block became
void loop(). Both mean 'do this over and over until the power goes'. - The C-shape that wrapped the blocks became the curly brackets. Same job: holding things inside.
- The white ovals became the numbers in round brackets.
- And every instruction gained a semicolon, because text has no edges to show where a line stops.
💡 Tip
The indenting — the two spaces before the inside lines — does nothing at all to the program. It is purely so humans can see what is inside what, the way the C-shape used to show you. Do it anyway. Code without it is unreadable.
Wire it up
1
Arduino board
1
Breadboard
1
LED
1
Resistor 220Ω
2
Jumper wires
Exactly the Level 1 Session 2 circuit. Nothing has changed.
Pins used9GND
Set up the editor
- Open the Arduino IDE.
- Go to Tools → Board and choose Arduino Uno.
- Go to Tools → Port and choose the port your board is on. On Windows it looks like COM3; on a Mac it starts with /dev/cu.
- You will see a file already containing an empty setup() and loop(). That is the skeleton — the two blocks from the comparison above, waiting to be filled.
🔧 If it goes wrong
If Port is greyed out, the board is not talking to the computer. Almost always a charge-only USB cable. Swap the cable first.
The code
Type this. All of it, by hand.
Your program
1void setup() {
2 pinMode(9, OUTPUT);
3}
4
5void loop() {
6 digitalWrite(9, HIGH);
7 delay(1000);
8 digitalWrite(9, LOW);
9 delay(1000);
10}
Line by line
- Line 1 —
void setup()starts the block that runs once at power-on. - Line 2 —
pinMode(9, OUTPUT)tells the board that pin 9 will be pushing electricity out, not reading it in. This had no block in mBlock; it was done for you invisibly. - Line 5 —
void loop()is last year's forever block. - Line 6 —
digitalWrite(9, HIGH)is 'set pin 9 to HIGH'. - Line 7 —
delay(1000)is 'wait 1 second'. Milliseconds, so 1000 means one second.
⚠ Careful
pinMode is the one genuinely new idea here. In C++ you have to declare what a pin is for before you use it. Forget it and the LED will be very dim, or do nothing at all.Try it
- Click the tick to compile. This checks the text without sending anything to the board.
- Click the arrow to upload.
- Watch the LED.
What should happen: one second on, one second off. Exactly like last year.
🔮 Try this
Change
delay(1000) to delay(100) and upload. Then make the on-time and off-time different, so it flashes like a heartbeat. You are now changing a program by editing numbers in text — which is much faster than finding blocks.If it goes wrong
| What you see | Why | What to do |
|---|---|---|
| 'digitalWrite' was not declared in this scope | A spelling or capital-letter mistake. | It is digitalWrite — lower-case d, capital W. C++ is fussy about capitals. |
| expected ';' before '}' token | A missing semicolon on the line above. | Look at the line before the one named in the error. |
| Compiles fine, LED does nothing | pinMode is missing, or it is in the wrong way round. | Check line 2 is there, and that the long leg of the LED goes to pin 9. |
| Port greyed out or upload fails | Board not connected, or the wrong port selected. | Tools → Board → Arduino Uno. Then Tools → Port. |
What you learned
- Every program has setup() and loop(). They are the green flag and the forever block.
- pinMode declares what a pin is for. Blocks did this for you.
- Instructions end in a semicolon.
- Indenting is for humans, not the computer. Do it anyway.
- Blocks and text are the same thing wearing different clothes.
Challenge optional — only if you finish early
- Take the blocks program and the C++ program and write, line by line, which block became which line. Every one.